Campbell-Tx.Net
Home Page
Campbell-Tx.Net
Mac OS X Page
Campbell-Tx.Net
Linux Page
| Welcome! |
Campbell-Tx.Net Home Page |
Campbell-Tx.Net Mac OS X Page |
Campbell-Tx.Net Linux Page |
|
Welcome! If you are reading this, you've either made the decision to make the big leap from the land of Linux to the land of Macs, or are contemplating that decision and are looking for more information. Either way, congratulations! Switching to Mac is a great decision. If/when you do take the plunge, you won't regret it! How do I know? Because I did the very same thing some time ago. At the time, I found that lots of "switcher's guides" were avaiable, but none that were aimed at Linux users (surprise, surprise, they were all aimed at Windows switchers. Imagine that!). After all this time, I have yet to find a Linux oriented switcher's guide, and so I have set out to write one ...and this is it! This guide attempts to help you with the transition from Linux to Mac. Lots of things are different and it can take a while to figure them out. Hopefully this guide may be of some aid in the process. Over my steadily lengthening time in "Mac-land", I have slowly acquired enough knowledge to create this guide. Some of that knowledge has been gained the hard way, some of it has been gained by reading the excellent "Mac OS X The Missing Manual, Tiger Edition" book, and a whole lot of it was gained by interacting with the wonderfully helpful community at www.mac-forums.com. Mac-Forums has been of such great benefit to me that one of the first things I would recommend you do is register there. The community at Mac-Forums is incredibly helpful. Read the posts. Ask questions. Just hang out. Get to know your way around. You will be warmly welcomed. BTW, you will see me there regularly under the user name "mac57". Say hello! |
|
|
I hope that this guide may be of some help to you as you switch. If you have any questions, or see any areas that could be improved or indeed have any other comments, don't hesitate to get in touch! Email me at: webmaster@campbell-tx.net OK, lets dive in. First things first. Start by acknowledging that you are switching. Mac OS X isn't Linux! It doesn't look like Linux. It doesn't behave like Linux (well, OK, maybe it does just a little - more on that below). As you switch, try to keep this in mind. Keep an open mind and try out the "Mac way" of doing things for a while before reaching any conclusions about the best way to do things. I found it helpful to make a conscious decision to do full "Mac immersion" for a few months before making any decisions. I approached everything by asking "what is the Mac way to do this?", as opposed to trying to recreate my Linux experience on the Mac. It was very helpful and I would encourage you to do the same. Alright - enough preamble. Lets proceed with the guide... |
|
Mac OS X is not "Mac Oh Ess Ex", it is "Mac Oh Ess Ten". Worth knowing. This is how Steve Jobs himself says it. I think he's the authority! |

|
Yes, you can. You can do this via dual boot with Boot Camp and/or via virtual machine with Parallels. In both cases, this is for Intel Macs only. But you really don't need to. Mac OS X is based on FreeBSD. There is a strong unix heart beating underneath that shiny OS X exterior, right down to an installable X11 implementation (on your OS X install DVDs). Couple that with DarwinPorts (more info below), which lets you build Open Source apps from a fully version and dependency controlled source distribution and you have everything you need. You really don't NEED to run Linux on your Mac - Mac OS X is the best of both worlds. |
Mac OS X and Linux share a number of file systems in common, which is excellent for sharing external hard drives between your Linux system and your shiny new Mac. They are:
|
|
|
|
Getting your personal files off of your Linux system and onto your Mac actually turns out to be pretty easy. There are lots of ways to transfer files from Linux to Mac OS X. Here are some of the more obvious ones:
|
|
Don't use FAT32 for that external drive if you can avoid it.
If you do copy your files out to a FAT32
harddrive as your transfer mechanism, all the owner and
permission information is lost. This can be catastrophic for some programs like
Thunderbird, which you can run under both Linux and Mac OS X. HFS+ is a great choice for the transfer format as it supports full ownership and permissions attributes. Plug the drive to be used for the transfer into your Mac and reformat it for HFS+ via the Disk Utility (access this via SHFT+CMD+U, and double click Disk Utility to launch it). Then take that disk over to you Linux system and mount it there. Assuming for a moment that it is a USB drive, and it normally shows up as /dev/sda1, the mount command will look something like this: mount -t hfsplus /dev/sda1 /mnt/sda1 -o rw,user,users You can then do the transfer using the hard drive, keeping all owner and permission information intact. |
|
|
What is the first thing you will look for once you have all your files over on your Mac? Of
course, your trusty old command line. After using Linux, even the thought of having to rely
on a GUI alone probably gives you the heebie jeebies. Relax, Mac OS X is based on FreeBSD. It contains a full set of unix command line commands and a very capable xterm-like program called Terminal which runs bash. To open Terminal, type SHFT+CMD+U and select Terminal.app from the window that opens. From here you should know what to do! Do note that this is the FreeBSD (i.e. Unix, not Linux) variation of the command line commands, so some of the command line switches may be different. Happily your good friend "man" is there too, and so you can always check the man page if in doubt. If you like Terminal.app, you may want simple desktop access to it. Why not add it to your Dock? Doing this is easy - just drag the Terminal.app icon from your Utilities folder to your Dock. The existing icons will obligingly slide apart to create space for their new companion. Release the mouse and you have just added an application to your Dock. Now, to launch Terminal whenever you want, a single click on the Terminal icon on your Dock will do the trick. If you are feeling adventurous, you can install Apple X11 (it is on your Mac OS X Tiger install disks) and then you will have a real xterm at your disposal. It has pretty much the same functionality as Terminal, but the keymappings are more like what you may be used to from Linux. |
|
|
If you do fire up Terminal or an xterm, you may be in for a bit of a shock. It would seem that your
Backspace key and your Delete key BOTH behave like the Backspace key! Annoying to say the least. Here
is how to fix this - how to make your Delete key act like a real Delete key, which is to say that it deletes the character currently under the cursor rather than doing a Rubout (delete the character to the left of the cursor) or worse still, insert a "~" into the line. This solution is specific to the bash shell, and works for bash under both Apple's X11 xterm and Terminal.app (bash is the default shell in both cases). Create a file in your home directory called .inputrc - Put the following single line into that file: "\e[3~": delete-char Restart Terminal.app or create a new xterm if using X11. Thats it! I have tested it and it works like champ. bash apparently reads this file every time it starts. You can read LOTS more about this problem and related problems by Googling the phrase "bash delete key". Apparently this is a VERY common problem. |
|
As an experienced Linux user, you know what you want the HOME and END keys to do. HOME should jump the cursor to the start of the line and END should jump the cursor to the end of the line. Guess what? In Mac-land, they do something different! In Mac-land, the HOME key jumps to the top of the document and likewise, the END key jumps to the end of the document. Happily, all is not lost. The Mac does have the "start of line" and "end of line" functions - they are just implemented differently. Here is the mapping:
|
|
The CMD Key is critical key on your new Mac keyboard! The CMD key is that funny key on each side of the space bar with the Apple logo on it. The CMD key is your friend. You will use it for a lot of stuff. Take a few moments to say hello! Here are some the common uses of the CMD key that you will want to know right away:
Copy n Paste by highlighting with the mouse and clicking the mouse scroll button? Sorry, just not there, even in Apple's X11. Instead, you have to use the default approach of highlighting the area of interest and then using CMD-C to copy it and CMD-V to paste it. This does have the virtue of letting you freely cut and paste between the X11 environment and the OS X GUI. |
|

|
There are LOTS of ways to launch applications using Mac OS X. The easiest of course is the Dock. The Dock is that bar of colorful application icons that by default runs along the bottom of your screen. Simply single click any one, and the associated application will launch. The Dock displays a small black triangle underneath any application that is running, to indicate this fact. This is handy as you can use the Dock icon of a running program to bring that program's windows to the front. Simply click on the icon and the progam's windows will spring to the forefront. As a final note in this area, if you minimize a window, it goes to the Dock and you can see it there. What if your application's icon isn't ON the Dock? Well, all of the applications generally live in the Mac's Applications or Utilities folders. You can summon these with the SHIFT+CMD+A keystroke for most applications and the SHFT+CMD+U keystroke for utilities. Pick the one you want, double click it and you are done. |
|
To put it simply, Macs don't have one. Macs rely on the Dock for access to your most used aps and the SHFT+CMD+A, SHFT+CMD+U keystrokes for the rest. Not good enough? REALLY want a System menu? No worries! There are at least two ways to do this. The first is to create a spring up Applications and/or Utilities menu in your Dock. To do this, open a Finder window. On the left panel, click Macintosh HD. You will see your Applications folder among many others. Click and drag the Applications folder to the RIGHT side of your Dock, anywhere to right of the visible divider line. The existing icons in this area will obligingly slide apart to create room for this new neighbor. Release the mouse. You now have the Applications folder on your dock, and a single click will open it and let you access applications to your hearts content. This may still seem clunky to you though. It is not a menu yet, just a shortcut to getting to the Applications folder. I promised you a System menu didn't I? Well here is how to get it. Instead of simply clicking the Appplications folder icon on your Dock, RIGHT CLICK it. Up pops just the menu you were looking for! HOWEVER this still may not do it for you. You do have a menu now, but it is essentially a menu with no structure. One level and everything is in that level, arranged alphabetically. Yearning for the ability to organize it into categories, like Graphics, Web Browsers, Email Clients, Multimedia and so on? Well, you can do that too, with a little bit of help from the Mac shareware community. To get the desired organized tree like menu structure, you need to get ClassicMenu. See: www.sigsoftware.com/classicmenu ClassicMenu is shareware, vs. free as in beer, but worth every penny. As a Linux based, open source minded switcher myself, I was unhappy about paying for ClassicMenu when I switched. However, as I said at the start of this guide, you do have to recognize that you are switching. For commercially based software like Mac OS X, the software model is different. You are switching, and you need to acknowledge that fact. I have been very happy with ClassicMenu. Give it a whirl - it is dead easy to configure, and has lots of clever eye candy as well. |

|

|
Well now we are making progress. You are probably feeling a little more at home with your Mac. Now, lets suppose that you have lots of applications running and you want to easily switch between them. How do you do that? No surprise - there are many ways to achieve this goal with Mac OS X. Simplest of all? Click the Dock icon for the program of interest. It will spring to the front. Alternately, use Mac OS X's innovative Expose feature, which shows you a minimized view of ALL of your open windows, allowing you to click one to select it. You can achieve this by pressing F9 on the keyboard. When you do this, all of your presently open windows will be shown in a reduced size on the screen, such that all are visible at once. Click the window of interest and it springs to the front. Easy! Expose will also do the same thing, but restrict it's scope to just the windows associated with current foreground program. To do this, press F10. All the windows of your presently running foreground program will be displayed in a reduced size, so that you can see them all at once. You can then select any one of them by clicking it. The selected window moves to the front. This is great if you are working with many open windows of a single program such as Mail, where for example perhaps you are cutting and pasting between several open emails. Finally, Mac OS X includes a "heads up" visual task switcher. Press and hold the CMD key. Now press the Tab key while continuing to hold down the CMD key. Mac OS X will display the "heads up" list of all of your running applications. Each time you press TAB (remember to keep holding down CMD the whole time) the focus moves to the next application. When you release both keys, the selected application comes to the front! Wonderful! |
| How do you resize windows? This is one area where I honestly feel that Mac OS X does not provide as much functionality as most Linux window managers. Unfortunately, there is only one resize "handle" per window, and that is in the lower right of each window. That is it. None of the rest of the edges can be grabbed and used to resize. Sorry! |

|
| A word about the Maximize (or Zoom) button that appears on each window. This is the colorful little green circle in the upper left, one of the three little circles that appears there. This is in fact Zoom, not Maximize. It will increase the size of the window to the largest size needed to show the full window contents. If that does not require the full screen, it won't take it! So, this is not a "maximize" button, but rather a "increase the size to the maximum amount needed to show the full window content" button. If the size of the window contents equals or exceeds the size of the screen, the operation will be the same as Maximize; else it will be different! |

|
|
|
Somehow I expect that the above has you wondering if you couldn't just change your Window Manager or perhaps change the skin used by Mac OS X. Well, the quick answer is that you cannot. Mac OS X simply doesn't support that sort of flexibility. |

|
If you are really dedicated to the cause, you can check out more Mac shareware in the form of the Shape Shifter and/or iCandy programs. They allow you to change the look 'n feel of Mac OS X and the icon set in use. However, I have never read a review of these that didn't make all sorts of cautionary noises about potentially really messing things up. Consequently, I have simply avoided them. The Mac OS X GUI is beautiful enough as it is, right out of the box. If you do chose to take the plunge and try reskinning, proceed at your own risk! |
| Don't despair however. All is not lost. You can make a fair number of changes to the look 'n feel of your Mac via a number of third party tools that all work within the boundaries established by the Mac OS X GUI. In my opinion, one of the best of these is TinkerTool, available free at www.bresink.com/osx/TinkerTool.html. TinkerTool will let you change many parameters of the Mac OS X GUI, along with many other aspects of system behavior. Highly recommended. |
|
Alright! You have transferred your files over, you have your favorite safety net command line running, and you have probably played with some of the included iLife apps on your Mac. However, the time will quickly come
when you want to install some new apps. How do you do this? Well, installing applications in Mac OS X is a breeze compared to the equivalent function in Linux or in fact Windows for that matter. First of all, the really great news is that you don't need a package manager in Mac OS X. There are no variable dependencies that you have to manage and so the whole concept is moot. How can this be, you ask? Well, there are two key reasons. First, unlike Linux, where a software author can never have any idea what base software may or may not be loaded on your system, Mac OS X is a known static base. Software authors creating new applications know exactly what the Mac OS X base contains, and it is the same on all Macs of the same OS X version (for example, 10.4.x Tiger) everywhere. That does simplify things, doesn't it? |

|
|
The second reason is simplicity and brilliance itself. Mac OS X application files are provided in .app format. A .app file is not a file at all but rather an archive. Contained in that archive is everything that the application needs: its executable, any additional support libraries and files it may require, icons, fonts, etc. So, the single file, coupled with the known contents of the Mac OS X base, is all that the program needs to execute. Hence, there is no need to manage dependencies, and usually (there are some exceptions) no need to even have an installer at all. You can normally just double click the application and run it immediately. This also means that the average application is wholly self contained, and does not scatter support files all over your disk. Brilliant! To see this concept in action, open your Applications folder and right click any application. Select "Show Package Contents" and you will get a view of what is in that application's archive. |

|
|
So, how do you install an application? Well, most applications come to you in the format of .dmg files. A .dmg file is a virtual volume file. When you double click it, Mac OS X mounts it as a virtual disk drive and shows you the contents in a Finder window. You can run the application directly from there if you wish, but you will have to open the .dmg every time to do it this way. The normal process to "install" an application is to drag it's .app file into your Mac's Applications folder (access this with the SHFT+CMD+A keystroke). This doesn't do anything magic - it just puts the application into a common folder where everyone can get at it. That's it. Your applicaton is "installed". Uninstalling is just as easy. Drag the application's .app file from the Applications folder to the Trash and you are done. Many apps save their current settings in your home directory's Library folder hierarchy, so there may be some files there that you need to clean out as well. Always worth checking. There are applications such as AppZapper that automate this process for you if you wish. I have never felt the need of them. |
| I love my Mac, but the font rendering really bothered me at first. It just didn't seem as good as it was on my Linux system. Given the long and troubled history of font rendering on Linux, that is quite a statement to make! To illustrate the issue, take a look at each of these screen captures. They are all of the same web site as rendered in Firefox 1.5 on each of Mac OS X, Arch Linux 0.7.2 and Win XP. Here they are, in order: |
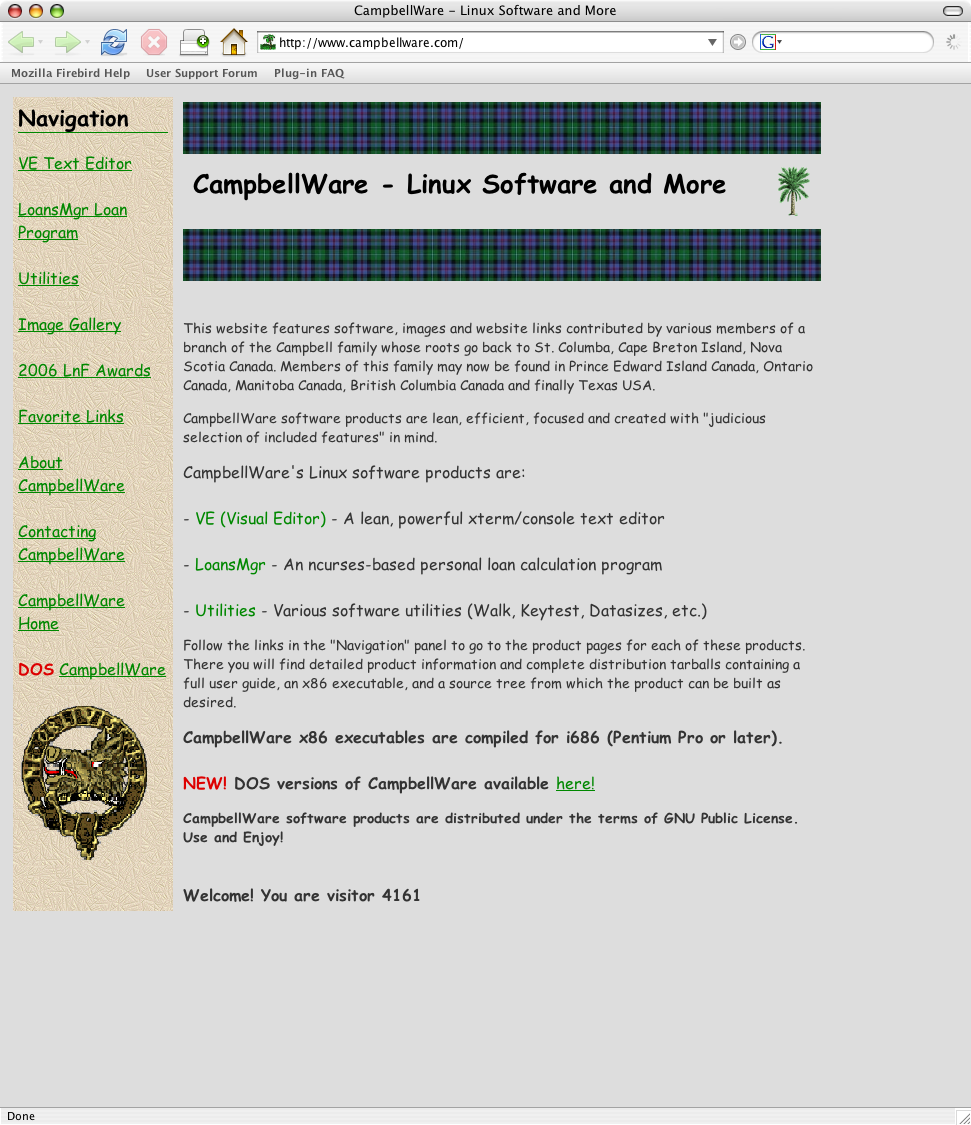 Mac Page |
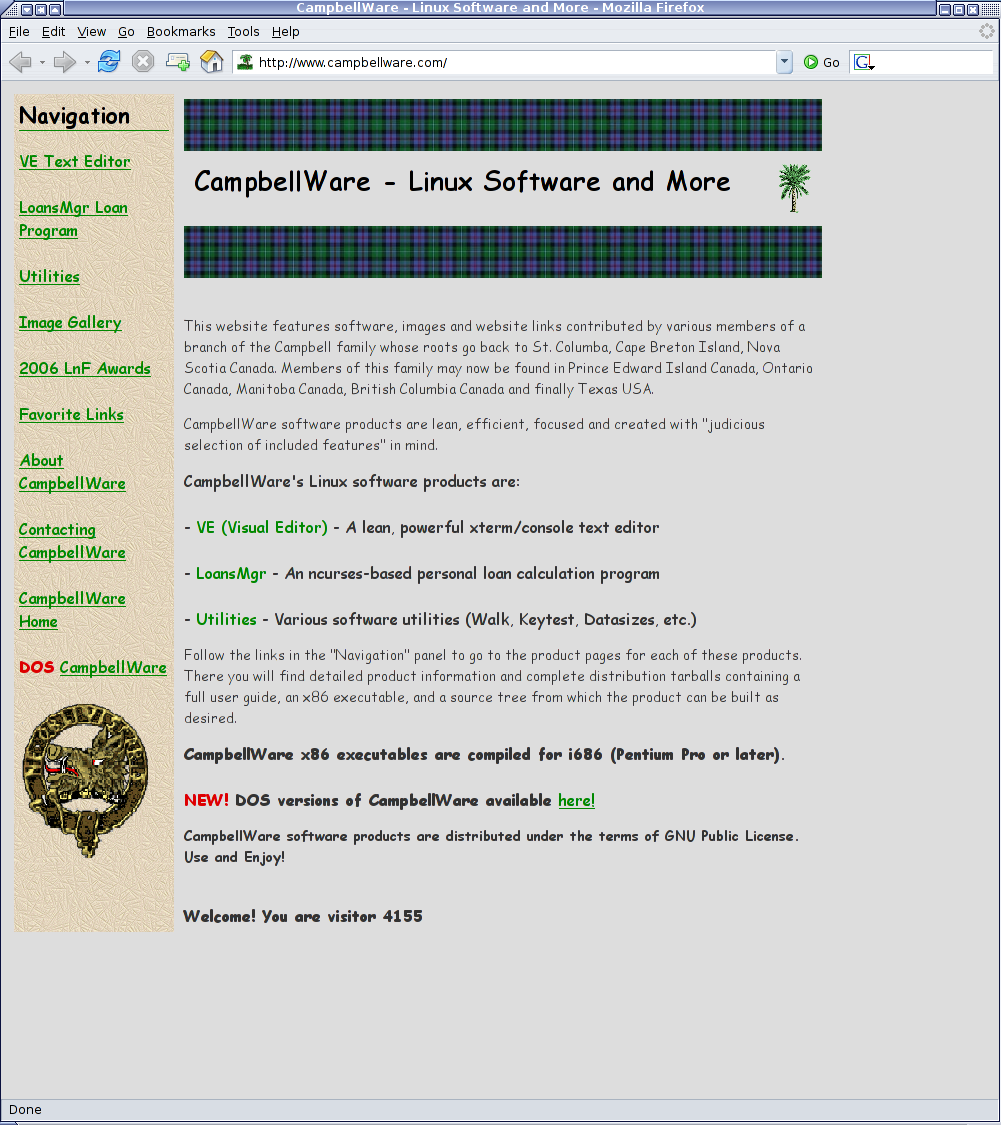 Linux Page |
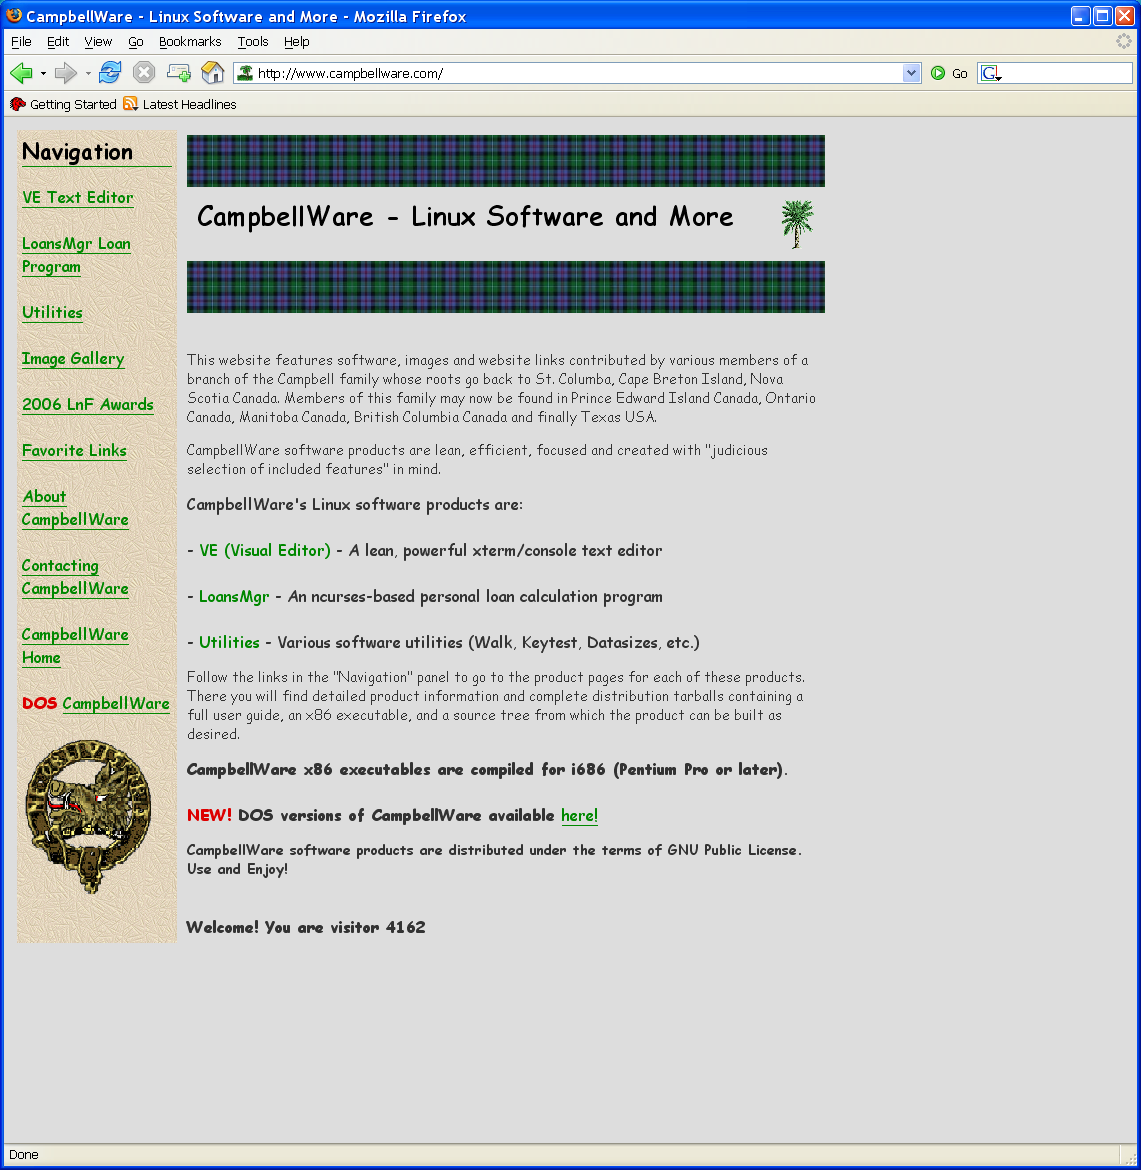 WinXP Page |
|
My initial thought was that these could best be described as "good" (Mac), "better" (Linux) and finally "best" (Win XP). I am referring in particular to the descriptive text on the page, not on the headers and labels, which look very nearly the same on all of them. However, the descriptive text gets crisper and sharper as you progress from Mac to Linux to Win XP. Trying to overcome this and make Mac font rendering as crisp and as sharp as it is Linux and Win XP, I messed around extensively with the [System Preferences, Appearance, Font Smoothing Style] selections. I discovered that either Light or Automatic produces the most Linux-like results, but still, the results didn't seem as good as either Linux or Windows. Or are they? After much reading and posting of queries on Mac support forums, I have learned that this style of font rendering is not a deficiency of Macs - it is an intentional stylistic decision. Apple has made an intentional decision on this matter in favor or smoother, rounder fonts, which are perceived to be easier on the eyes than the less smoothed fonts of Linux and Windows. This is a style and taste decision - there isn't a right and wrong here. I like the crisper ones, but Apple clearly feels that the smoother fonts are better. As a switcher, I have concluded that this little pain is worth the gain one gets from using a Mac. Oh well, the world isn't perfect! Interestingly, after a lengthy period of Mac use, I am starting to agree with Apple! When I do use Windows now, I honestly find the that font rendering seems to be "jaggy" to me. All things in time! That having been said, there are some things you can do to adjust font rendering on your Mac:
|
| When I switched from Linux to Mac, one thing I REALLY missed was multiple desktops. Mac OS X 10.4.x Tiger just doesn't support this functionality. Note that the upcoming Leopard release DOES support it, in the form of the Spaces functionality: |

|
Happily, the lack of multi desktop functionality in 10.4.x Tiger has been addressed by the shareware community. After much searching around, I settled on YouControl Desktops. See: www.yousoftware.com/desktops/desktops.php It supports multiple desktops and has the same sort of eye popping cube spinning effects that Xgl/Compiz is making such a splash with in the Linux world. I have been VERY happy with it. Like all endorsements of a commercial product in this guide (and sadly, YouControl Desktops is commercial software, not free as in beer), I have to state that I am not associated with the vendor in any way, just a happy customer. |

|
| BTW, mercifully YouControl Desktops doesn't provide ALL the effects that Xgl/Compiz does. Frankly, I found the full Xgl/Compiz implementation to be a bit over the top. I know that I could (and did) control all the effects, but the wobbly menus in particular were really just ...strange, and kind of annoying. There is a point at which eye candy for its own sake becomes a hinderance to enjoyable use of the computer, not a help. I think the full blown Xgl/ Compiz implemenation, with all the effects turned on, has crossed that line! Just my opinion of course. |

|
|
There is at least one more option. Check out VirtueDesktops at: http://virtuedesktops.info This is also a very well regarded multi desktop implementation. I like YouControl Desktops better, but that is a personal opinion only. |

|
Great news here! Mac OS X, thanks to its OpenBSD heart, can run pretty much all of your favorite open source software titles. Many of them require that you install Apple X11 - see the next section for details on that. There is a freeware software package called DarwinPorts that lets you build and run pretty much all of your Linux open source software on the Mac, right down to massive collections like KDE (although if you are wanting to run THAT much Linux on your Mac, perhaps you should just be sticking with Linux!). DarwinPorts is a seamless build environment that implements a complete and cohesive equivalent of a Linux distribution, even including full dependency management. Essentially, it downloads the source, configures it, builds it and installs it on the spot, and resolves any dependencies that are not present (downloads, builds and installs them first). See: http://darwinports.opendarwin.org I used DarwinPorts to build and install all sorts of great stuff, like gnumeric, abiword (although there is a Mac native version of this), xv, feh, xfe, gftp, mc... it is great, I love it. |

|
Like most things on a Mac, installing Apple X11 is easy. One disclaimer however. This guide recommends installing Apple X11 from your Mac OS X install disks. Apple X11 is also available from the Apple web site BUT it is an older version than is available on the install disks. Stick with the install disk version! OK, here is how to accomplish the X11 install. Put in the main gray install DVD that came with your Mac and open a Finder window to it. Scroll down until you find the Optional Installs package. Double click on it and when it comes up, agree to everything it asks and tell it the drive to install to (typically this will be your Macintosh HD). It will then give you a selection menu. Click this and expand the applications list. Select just X11 and proceed. This will install just the current version of Apple X11. Done! All your favorite X11 apps should now feel right at home. One last trick. If you leave your configuration as described above, you will have to manually start X11 before launching an X11 app. You can set up your X11-based applications to automatically launch X11 as part of their startup. To achieve this, simply do a Get Info (CMD+I keystroke) on the X11-based app in question and select X11.app from the Open With list. Now when you double click the application, it will launch X11 and then launch the application. OK, I know I said the above was the last, but there is yet one more trick worth mentioning. I bet you would like to launch X11 apps directly from the command line (Terminal.app) just like you used to from xterm? I know I did. To enable that, all you need to do is set the default DISPLAY variable. If you don't have one already, create a .bash_profile file in your home directory. In it, place the following contents (or add this to the contents already there if the file already exists): export DISPLAY=":0.0" That's it! You can now type such things as "gftp" at the command line and start up the gftp application (assuming you have installed it), which is an X11 application. |
You may be pleased to know that you may not need DarwinPorts for a number of your favorite open source apps. Many of them have Mac OS X native versions. Here is a partial list (these are the ones that I have found useful and downloaded):
|
|
Communicating with other people is a big part of what we do with our computers these days. That was true of your Linux system and it is also true of your new Mac. We communicate with others using multiple media: IM, email, VoIP calling and increasingly, even video calling. Your new Mac can not only match the communications abilities of your Linux system in these areas, it can even exceed them in many cases, if only because the vendor's Mac clients tend to be more advanced and feature rich then their Linux equivalents. Lets look at what's available: |

|
Instant Messaging (IM) - Linux comes with a number of IM clients, some good, some bad, some downright ugly. The Yahoo! client for Linux comes to mind for some reason! Most Linux users have gravitated to two of the excellent multi protocol clients (Yahoo!, MSN, AIM, Jabber, etc.) that are available these days, Kopete if you are a KDE user and Gaim if you are not (you can of course use Gaim within KDE too, and many people do). Neither Kopete nor Gaim exist in the Mac world, but happily a similar multi protocol client DOES exist: Adium. This extremely well regarded client can be found at: www.adiumx.com |

|
|
Email - Linux provides a virtual smorgasboard of different email clients, all with their own various strengths and weakenesses. Things are no different on the Mac. Mail clients abound! Of course the Mac comes with its own highly capable and well liked client, Mac Mail. Since Mail is provided with every Mac, it is the default choice of most Mac users. It is worth noting however that as of Mac OS X 10.4.x Tiger, Mac Mail no longer uses the industry standard MBX format for emails. Happily, a very popular email workhorse from the open source world, Thunderbird, is also available for Mac OS X. Thunderbird is an excellent client, and it DOES keep its email in industry standard MBX format. In addition to this, Thunderbird provides all the features you could ever want from an email client, and then more besides. Thunderbird is available at www.mozilla.com/en-US/thunderbird. There are many other email clients as well. Another reasonably popular choice is Microsoft's Entourage email client, which you will have a copy of if you have purchased Microsoft Office Mac 2004 (it is part of the Office :mac suite). Entourage can be thought of as Outlook Express on steriods. It is more capable than Outlook Express, but less capable than the full blown Outlook client provided on PCs.
|

|

|
VoIP and Video Calling - This is an increasingly popular application on computers of all flavors these days. The Linux standard in this area has to be GnomeMeeting, now relaunched as Ekiga on the occassion of the addition of SIP support to the previous H.323 technology base. There is no port of GnomeMeeting/Ekiga for Mac OS X, but Apple does provide iChat, which supports all of IM, voice calling and video calling. The problem with iChat is that its reach is limited to other iChat users, or those running AIM. In general therefore, it does not enable voice and video calling between you on your new Mac and the many friends you may have on Windows. This was a key advantage of GnomeMeeting. Being standards based (H.323) it supported calling between itself and any other H.323 client, which in practise meant any other GnomeMeeting equipped Linux systems, or pretty much ANY Windows PC, through Microsoft's NetMeeting, which is also an H.323 client. So, what to do? Well, several of the big IM clients now support voice and video calling, including Yahoo! and MSN. Since these all have clients for both Mac and PC, you can achieve voice and video calling to most people you may wish this way. Another excellent choice is Skype, which supports free voice and video calling between any two Skype equipped computers. Since Skype has clients for all of Mac, Linux and PC, this makes it an excellent all around choice. Skype has been my solution to voice and video calling on my Mac, and I have been very happy with the quality of both the audio and the video, not to mention the excellent cross platform support. I regularily video call with folks running the Skype Windows client and it all works very well. As you can probably tell, Skype would certainly be my recommendation as the Mac enabler for your previous GnomeMeeting-based calling. You can get Skype at:www.skype.com |

|
|
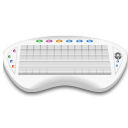
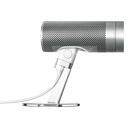
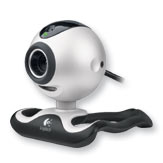
Webcams: Of course for video calling, you will need a webcam. Apple's answer to this is the iSight camera. If you don't already have one, get an iSight. If you have an iMac, a MacBook or a MacBook Pro, you already have one, built in. If you don't have one of these Mac models, you will need to purchase an external iSight camera. This is problematic these days - Apple is no longer distributing them for reasons unknown and unexplained. eBay would seem to be the only alternative for a current acquisition of an iSight. Nonetheless, iSight is the Mac way for webcams - just do it! If this is absolutely out of the question for you, and you have a perfectly good webcam that you really want to use with your Mac, see www.ecamm.com/mac/ichatusbcam from ecamm network. This $9.95 driver will allow you to use a fairly large list of webcams in lieu of an iSight on your Mac. If you chose to go this route, you will need to install the vendor's Mac OS X webcam driver before installing ichatusbcam. As a final option, if you don't have an existing webcam, but don't want to spend as much as is needed to buy an iSight, you might also consider ecamm network's imagewebcam, which is a webcam product made specifically for Macs (see www.ecamm.com/mac/imagewebcam). This webcam costs about a third of the iSight cost, but do note that it does not provide a microphone. |
|
|
Like every other computer, your new Mac has things that need to be configured. If you have kicked around the Linux world for any length of time you will know that configuration of Linux can cover the full gamut from sublime (SuSE's YaST, Ubuntu's System Administration menu tree) to ridiculous (ever try getting SAMBA to work on most distributions?) to downright impossible (think ALSA configuration if the installer doesn't get your sound card set up right!). Happily, Macs live firmly in the "sublime" part of the universe. Everything is gathered together in one place, System Preferences, and is managed with a set of simple and intuitive GUIs. Your new Mac will have a Dock item preloaded for System Preferences. It looks like a light switch with an Apple logo beside it - the icon appears to the left of this text. Go to System Preferences to configure everything from the look n feel of your desktop, to your Mac's IP address on the net, to that sound card volume we were just talking about... Poke around in System Preferences - there is LOTS of good stuff there. |
| While we are on the topic of configuration, are you are interested in seeing every known detail of how your Mac is configured from a hardware perspective, and what applications are loaded, and what their version numbers are, and lots more stuff that you may not have even realized you were interested in? Well, if you are, point your mouse pointer towards the little blue Apple logo in the upper left of your system Menu bar. Click it and select "About This Mac". Some very basic, but very useful, information is presented right away, things like the version of OS X, the amount of memory you have, the type of CPU you have and so on. But for the really good stuff, click the "More Info..." button near the bottom. This launches the System Profiler utility, which displays EVERYTHING you could EVER want to know about your Mac, and lots more that you probably didn't! Enjoy! |
|

|
OK, a vaguely humorous title for a potentially important topic - routine maintenance. How do you keep your Mac humming along at the peak of efficiency? Linux users with more than a passing familiarity with Windows may wonder about all sorts of things: defragging, updating virus definitions, constantly staying on the watch for spyware... by and large, Linux protected you from all of that - do you need to start worrying about these things again as you venture into the brave new world of Macs? Happily the answer is no. Since it is based on unix, Mac OS X is actually VERY secure. Nothing is completely impenetrable, but Mac OS X is every bit as stout in the face of attack from the outside world as your Linux system was. That having been said, nothing is completely maintenance free, but Mac OS X is remarkably easy to live with in this area. Lets look at the expected areas of maintenance, and what each translates to on your new Mac: |
At this point you are probably wondering whether you need to do any routine maintenance. Well, now and then you do, but not that much:
|
Phew! It has been a long day. If you have read this far, you are probably tired. Come to think of it, I bet your Mac is too. Perhaps you should let it get some sleep. Yep, sleep. Some Linux distributions support Hibernating, but it is pretty hit and miss as of yet. Mac OS X fully supports this concept. You can put your Mac to sleep by simply selecting Sleep from the Apple Menu that appears in the upper left of your Menu bar. The Mac is snoozing away in only a few seconds. To wake it up, press any key on your keyboard and it will be back with you in about 10 seconds.
If you put your Mac to sleep each night and awaken it again each morning, you preserve this and all your most used apps just "snap" into being when you start them anew. I love this incredibly fast response, and so I use the sleep/wake cycle on my Mac pretty much exclusively. About once a week I reboot just as a form of clean up. Tuck your Mac in and put it to sleep at night - it saves power AND delivers blazing fast application start up times. |
| See Apple's web site for a page brimming full of power user tips! www.apple.com/ca/pro/tips |
| Now that you are driving your shiny new Mac, you are probably wondering "what are the Must Have apps?". Well, here is my very subjective list: | ||
| MenuMeters - www.ragingmenace.com/software/menumeters This wonderful program can display all sorts of useful and real time updating computer status information on your Mac's menu bar. This includes such things as CPU load per core, Internet uplink and downlink speeds, disk activity, memory usage, etc. Because this information is always visible in your Menu bar no matter what programs are running, it quickly becomes invaluable. |
|
|
| iClock - www.scriptsoftware.com/iclock/iclockmac.php This program completes the date and time offering that Mac OS X provides on the Menu bar. By default, Mac OS X provides the day and the time. iClock augments this with the day of the month and the month itself. It also allows you to configure the color and fonts used to display this information. This is only the beginning though. iClock also provides goodies like floating world clocks, a menu of currently running programs (which can act as a task switcher), a calendar application and much more. iClock is a fabulous bit of shareware. |

|
|
| iGlasses - www.ecamm.com/mac/iglasses Got an iSight camera? Don't be without iGlasses. It is the "preferences panel" that Apple seems to have forgotten to give us for the iSight. You can control a vast range of parameters with respect to the image quality and speed, plus many clever effects as well. |
|
|
|
Path Finder - www.cocoatech.com Path Finder is a serious file manager for serious file management. I use Mac's Finder for simple day to day stuff, but when I need to do backups, detailed reconfiguration of folders and so on, I pull out the heavy armor, Path Finder. You won't believe how many additional functions it adds, and how much easier they will make your heavy duty file management activities. Path Finder also implements an optional replacement desktop for the Mac, providing significantly more functionality than the standard desktop. You don't have to use this desktop feature of course, and it is turned off by default when you install the program. Hence, there is no need to worry that it will take over your Mac when you install it. |

|
|
| Classic Menu - www.sigsoftware.com/classicmenu This invaluable application lets you manually configure a menu of available applications in the usual cascading menu fashion, rather like the launch menus in almost any Linux window manager (or the Windows Start menu). AND, in addition to this, it can change that boring blue Apple symbol on the upper left of your menu bar to the original vibrant multi colored apple - this is worth the shareware fee all by itself in my opinion! As I outlined earlier in this guide, you can certainly achieve a form of cascading menus via the Dock, but I just LIKE them on the menu bar better! |

|
|
| Smultron - http://smultron.sourceforge.net Despite the unusual name, Smultron is an absolutely stand out text editor, and it is free. IMHO, it is the best I have seen so far. This guide was in fact prepared with Smultron. Smulton includes the most intuitive multi file support I have ever seen, displayable line numbers, syntax highlighting, split window viewing ability, innovative text snippets (sort of like a multi element clipboard), HTML preview, a command line utility and much, much more. If you try it and don't like it consider TextWrangler, which is also very good, and also very free. |

|
|
| CyberDuck - http://cyberduck.ch Another application with a most unusual name, Cyberduck is a very capable (and very free) FTP client for your Mac. CyberDuck is pretty much THE standard for Mac FTP clients. As a Linux switcher, don't forget that the humble command line "ftp" command is also available, patiently awaiting your attention at a Terminal session near you! |

|
|
| Xee - www.macupdate.com/info.php/id/19978 Xee is a wonderful image viewer in the mold of Kuickshow, feh or qiv. Rare among Mac image viewers, it has the attribute of being able to go forward and backward amongst the images in an image folder without having to first select the set of images of interest. It will simply advance or retreat in an ad hoc fashion as you wish. This all by itself makes Xee a real standout. If you try it and don't like it, consider FFView, which has a similar attribute AND features voice driven file navigation OR CocoViewX, another excellent viewer that can also create HTML image gallery pages, complete with thumbnails and titles, from any folder of images. |

|
|
|
Skype 2.0 for Mac - www.skype.com Skype for Mac 2.0 is an excellent video capable VoIP communicator. It is rather like GnomeMeeting in that it can support voice and video calling between two Skype equipped computers, but it provides significantly more functionality overall than GnomeMeeting does. As a key difference, Skype works well behind routers and firewalls, something GnomeMeeting is more or less incapable of doing without extensive firewall configuration. If you have previously used the Windows Skype client, you will find that Skype for Mac 2.0 is a little more on the "vanilla" side, lacking some of the "clever" features of the Windows version, but nonetheless, it gets the job done. |
|
| We all spend a lot of time on the web these days. Our web browser may be the one piece of software on our computer that we know better than any other. So which is the best browser for your new Mac? Here is a run down on the best and fastest web browsers available for Macs (in addition to the excellent Safari browser that comes with Mac OS X): |

|
Sunrise: available at www.sunrisebrowser.com/en Current version: 1.0.6. Memory footprint: 22 MB real memory, 400 MB virtual memory Bookmark Import: auto imports Safari bookmarks Subjective: very fast to load and to load pages, supports lots of interesting features, including innovative graphical bookmarks. Somewhat quirky non-Mac looking interface, but very functional and VERY fast. |
|

|
Camino: available at www.caminobrowser.org Current version: 1.0.3 Memory footprint: 28 MB real memory, 396 MB virtual memory Bookmark Import: Can import bookmarks from Safari, Firefox and Opera Subjective: Very fast to load and to load pages. Uses same Gecko rendering engine as Firefox. Very much a Mac application, sporting a very nice look n feel that Mac users will be quite comfortable with. Noticably faster than Firefox to startup and to render pages. As they say on their web page "it's brisk, baby!". |
|

|
BonEcho: available at www.beatnikpad.com Current Version: 2.0.0.4 Memory Footprint: 37 MB real memory, 397 MB virtual memory Bookmark Import: imports Safari bookmarks Note: This is an optimized version of Firefox 2.0.0.4. Specific apps are availalable for G5 and Intel processors. Subjective: Fast to load, feels lightening fast to load pages. A significant speed differential over the stock Firefox offering. Looks, feels and behaves like Firefox in all regards but its speed, which is much better. |
|
As a comparative note, Safari's memory footprint is 90MB real memory and 445 MB of virtual memory. The stock Firefox 1.5 takes 34 MB of real memory and 392 MB of virtual memory. This makes Safari the "heavyweight" of the group. So, which one is the best? Subjectively, after playing with all of these browsers, BonEcho seems the best of them, given the full feature set, the average memory consumption and the excellent speed of operation. Bear in mind however that it does not sport the tight integration with other Mac software elements that Safari has. This leads to the following general recommendation, which resonates well with my general advise at the start of this guide to go for full "Mac Immersion" before making any binding commitments. If you are not strongly opinionated, try out Safari. Stick with it for a week or two (long enough for the "newness factor" to wear off) before deciding if you like it. If you don't, either Camino or BonEcho are excellent choices. Of course if you are strongly opinionated, you don't care what advice I have anyway, so I won't go any further - use whatever the heck you want to! :-) |
Twelve Things You Will Love About Your Mac |

|
Well that's it. Congratulations - you have read the entire guide and lived to tell the tale! As a parting thought, I would like to leave you with a small set of things I think you are really going to love about your new Mac (or at least, a partial set of the things I really love about my Mac):
|
| Enjoy Your Mac! |
Campbell-Tx.Net Home Page |
Campbell-Tx.Net Mac OS X Page |
Campbell-Tx.Net Linux Page |


